
What Is Net Promoter Score?
Often referred to as NPS, this rating system was invented over two decades ago and has been the industry standard across businesses ever since. This means, your clients are likely already getting and responding to NPS surveys from other places they do business.

Because NPS is standardized to be a single-question survey, with a scale from 0 to 10, it allows the survey to be a true measure of brand loyalty.
In other words, if your competitor has an overall NPS score of 55 and yours is 79, you can be confident that difference is not because they're asking a different question or using a different scale. Customers are answering the exact same question with the exact same scale, presented in the same manner, and your results are better than your competitors.
Because collecting NPS feedback is a standard business practice, there is no need to adjust the survey or tweak it, since your customers are likely to recognize both the question and the order of the numbers on the scale. That's good news! It means, by using Fuse's robust NPS campaign, you're gathering great data about your agency in an expected way.
The Fuse NPS Campaign High-Level Overview
Fuse provides an option to ask customers for a Google Review after they give an NPS score on the landing page. You can toggle the option to leave a Google review on or off under Settings > Agency and Locations > NPS Configurations in your Fuse admin.

-
If this option is turned off, customers who give an NPS score will never be asked to also leave a Google Review
-
If this option is turned on, customers who give any NPS score will also be asked to leave a Google review as long as the Agency's overall NPS score is 65 or higher. If the Agency's overall NPS score is below 65, then nobody will be asked to leave a Google Review until the overall NPS score reaches 65 or higher.
Logo Assignment
-
Emails sent - Logo will pull from Settings > Agency and Locations > Email Theme & Colors
-
When no email theme is set, for NPS survey email logo is pulled from Settings > Agency and Locations > Location Logo, all other emails will have no logo.
-
NPS Landing Page - Logo will pull from Settings > Agency and Locations > Location Logo
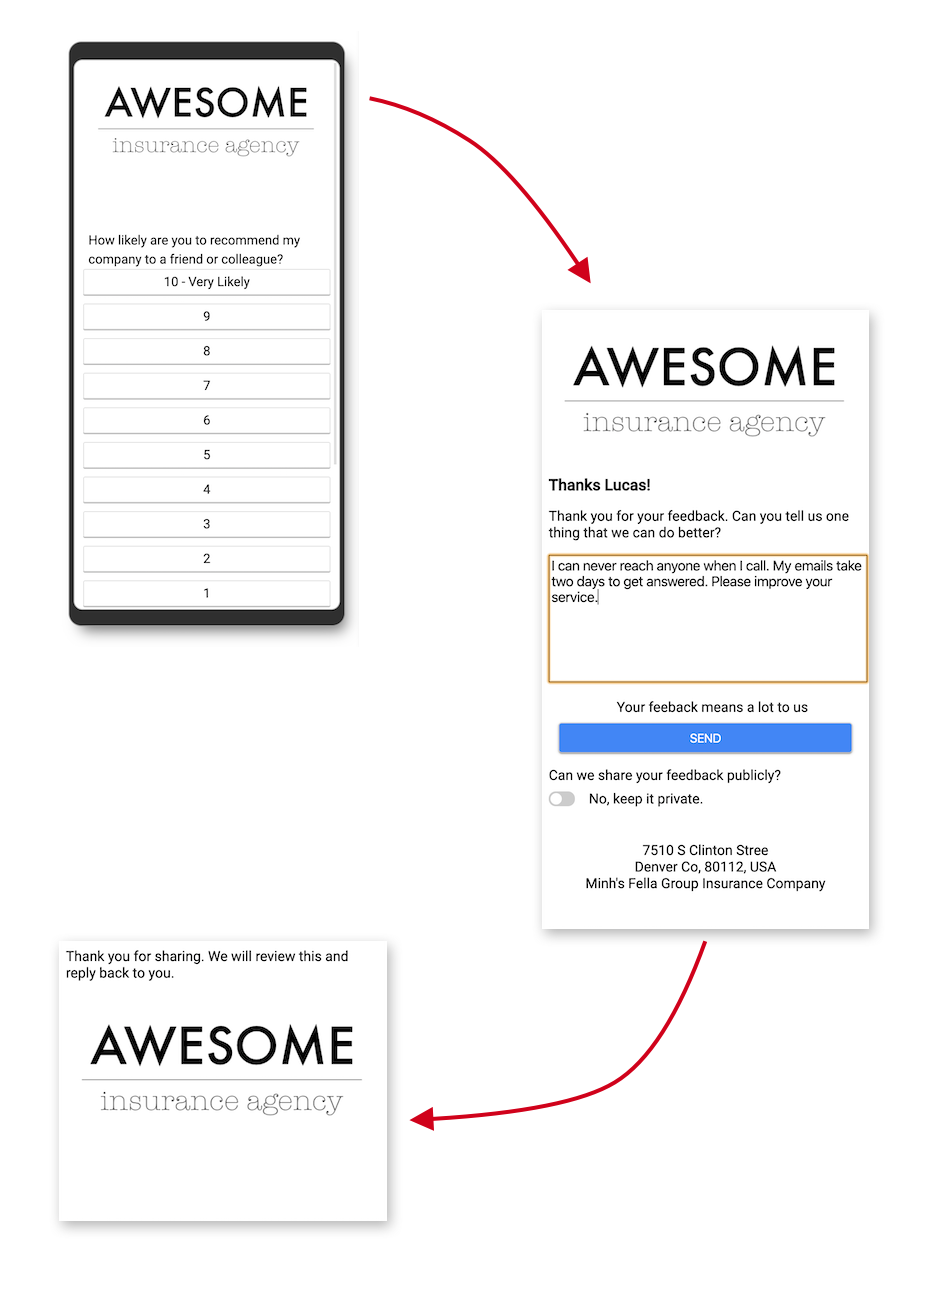
Standard Flow Overview
If you have Google Reviews toggled off or if you have Google Reviews turned on but your current overall NPS score is below 65, then this is the flow that your users will experience:
Google Review Feedback Bridge Overview
For this flow to be activated, you first need to turn on your NPS campaign and run it until your NPS score is greater than 65. If you have a low NPS score, please contact us for advice on how to improve this number.
In this flow, everyone will be asked to leave a review on Google, even those who gave you a score of 0. This is by design. Google does not allow selectively asking people to leave a review on Google.
We've made it easier than ever to bridge between NPS feedback within Fuse and having your clients leave a Google review. Once your customer works through the NPS feedback flow, they will be able to easily copy and paste their written feedback right onto your Google Reviews page.

We've made this process as simple as possible for your clients to easily add their NPS feedback right into Google to help bolster your online presence.
Note: this NPS feedback bridge connection is not automatic to protect the integrity of your Google profile.
NPS Response Best Practices
We strongly recommend that you follow up with all NPS feedback, positive or negative, to ensure strong client relationships. Closing the loop and making sure your clients feel attended to is one of the key ways to increase retention at your agency.
Check out our article on making the most of your NPS responses here.
NPS is a registered trademark, and Net Promoter Score and Net Promoter System are service marks, of Bain & Company, Inc., Satmetrix Systems, Inc., and Fred Reichheld.