There are two different ways to automatically add people to your marketing campaigns:
-
Trigger Points - These are specific, pre-defined events that Fuse can detect in your customer's life-cycle. Click here to learn more about Trigger Points!
-
Segment Matches - After creating unique Account Segments based on your own desired criteria, customers can be added to campaigns when they match a chosen segment.
In this article, you will learn about using Segment Matches for campaign automation.
Before You Start
Quick note: During your first integration sync we won't detect any events. This allows Fuse to obtain all of your existing data first and ensure it has a complete customer history before it begins to detect events based on changes that occur in the account going forward.
Using Custom Segment-Matches to Automate Campaigns
You can define segments using the segment builder to identify anyone to who you may want to automate marketing to. First, define your segment. Let's illustrate this with an example: We want to automatically send to Personal Clients who spend at least $8,000 in premium a year.
Create Your Segment
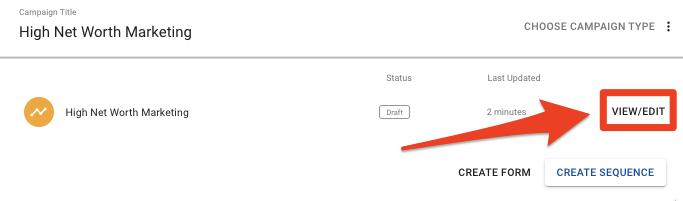
Select the campaign you would like to create the segment for, and click "View/Edit":
Next, you will want to click the pencil icon to choose a segment, then click "+ Add Segment", and name your segment:
To create your segment, you will want to define your criteria. In our example, we will create criteria to target Personal Lines customers who spend at least $8,000 per year. We will do this by adding two rules to this segment:
-
-
Create a rule to target Personal Lines customers.
-
Create a rule to target people who spend more than $8,000 per year.
-
-
First, let's add a rule to target Personal Lines customers:
-
-
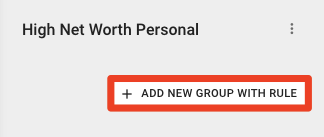
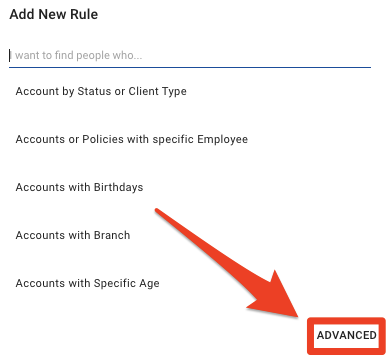
Click "+Add New Group With Rule," and then click "Advanced" to create a new rule.
-
-
-
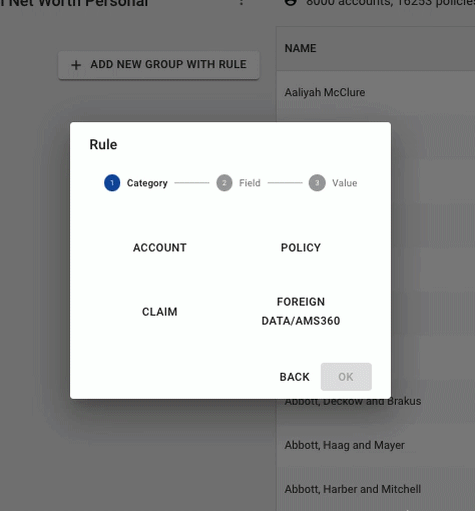
Select Policy>Is "Personal," and then click "Ok":
-
2. Next, let's add a rule to target people who spend more than $8,000 per year:
-
-
Again, click "+Add New Group With Rule," and then click "Advanced" to create a new rule.
-
Account Premium>Total Premium>Greater Than>$8,000:
-
In the end, our segment criteria look like this:
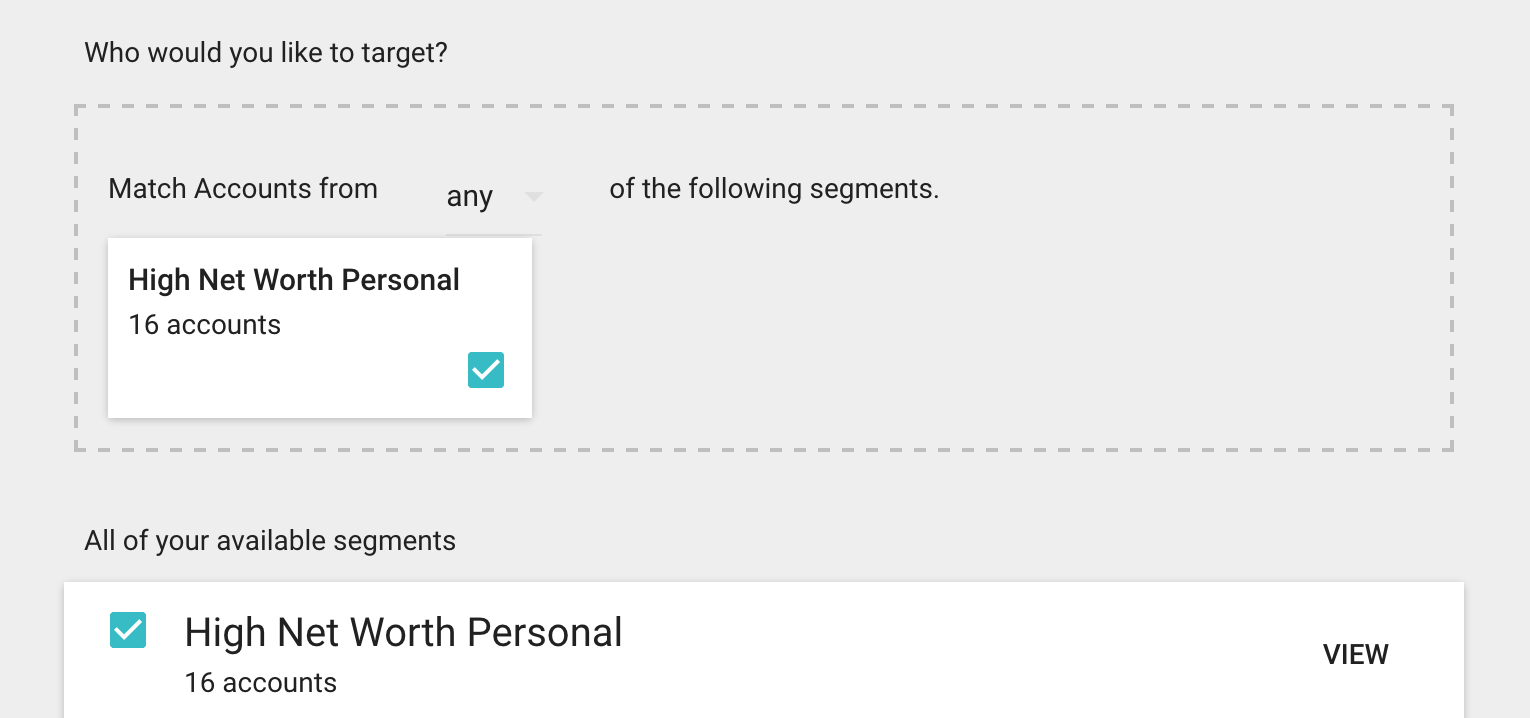
Finally, select the segment that you have created:
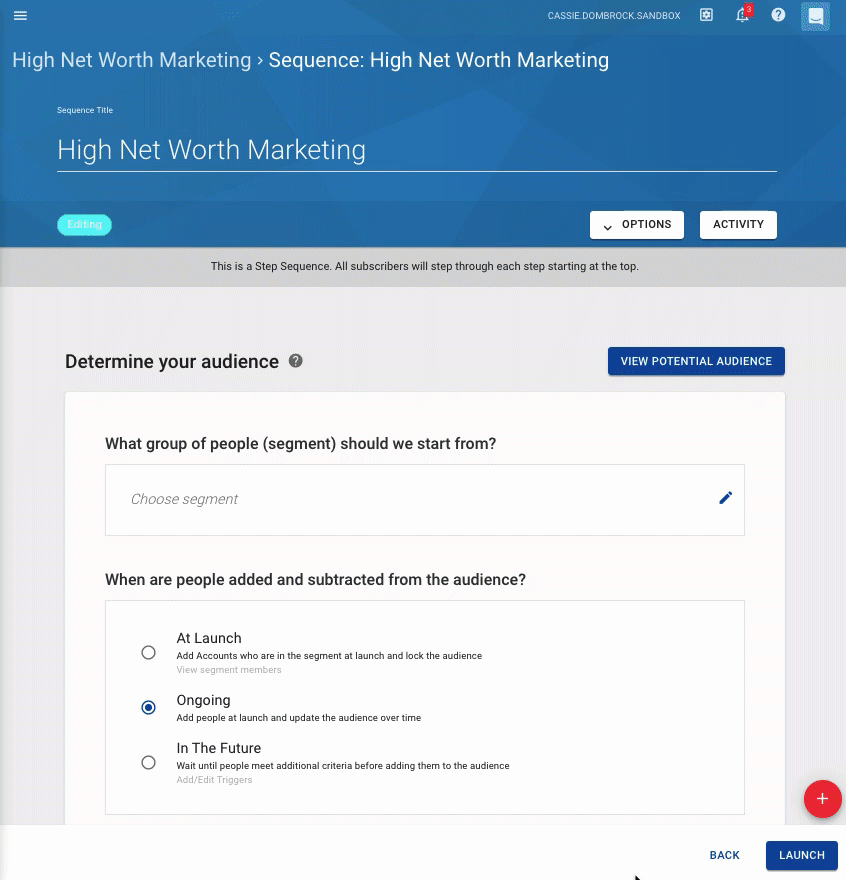
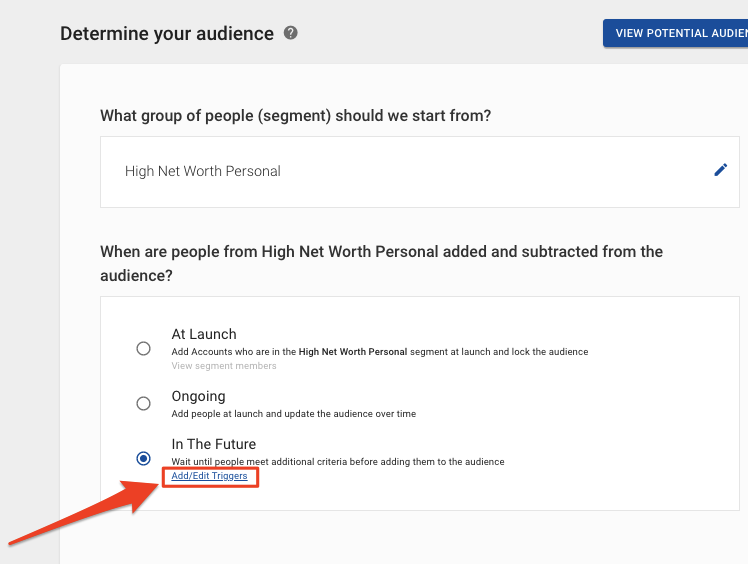
Making It Run Automatically
Now that your criteria are set up, you need to tell the system to add new customers who match these criteria to the campaign. You may also want to automatically remove them when they no longer match the criteria.
Add When Trigger
Head back to the Sequence Settings, and to add the trigger that will add new customers who match this criteria:
-
Click on "Add/Edit Triggers":
-
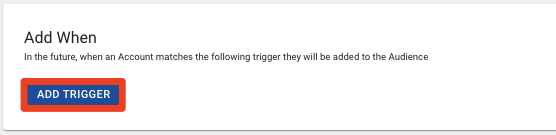
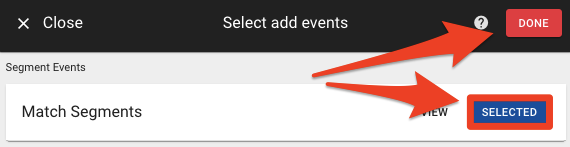
Next, we will be adding a trigger when the customer matches the segment by clicking "Add Trigger," select "Match Segments," and "Done":
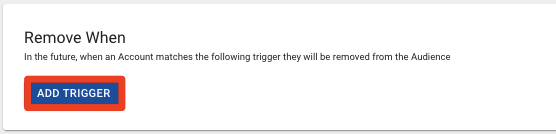
Remove When Trigger
-
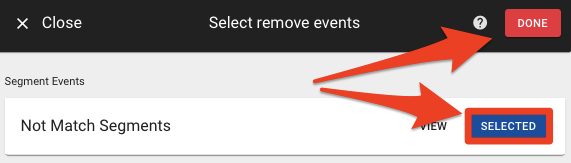
To automatically remove customers when they no longer match the criteria select "Add Trigger," then select "Not Match Segments," and "Done":