
Email Broadcasts in Fuse are ideal for one‑time, manual messages—such as office closures, natural disasters, or timely announcements—without creating a full campaign. This article explains how to create, edit, attach files to, and send a broadcast email, as well as how audience selection and send options work.
Creating an Email Broadcast
Use Broadcasts for quick, one‑off sends instead of building an entire campaign.
-
Go to Marketing > Broadcasts in your AR workspace.

-
Click the Send button and select Send Email from the dropdown menu.

-
Choose one of the following options:
-
Browse Message Library to use an existing template.
-
Use FirstDraft, our AI writing tool, to help you draft or refine your broadcast email content (see the FirstDraft help article to learn more about how it works and how to customize it for your agency). To learn more about how FirstDraft can help you communicate with clients, check out this article.
-
Start From Scratch to open a blank email in the builder.

-
-
If you start from scratch and later change your mind, you can still switch to the Message Library using the button at the top of the screen.
Editing the Email
Within the email builder, you can configure sender/recipient, subject, body content, and attachments.
Here is an overview of the items within the email that you can edit:
-
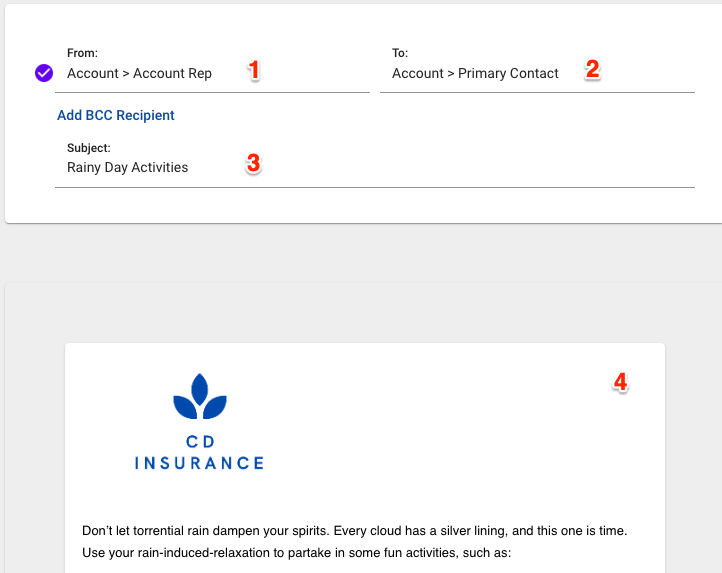
Email Sender: Choose who the email appears to come from: Account Rep, Producer, or a Specific Employee configured in Fuse.
-
Email Recipient: Select which contact within each account receives the email (for example, primary contact or secondary contact). Click here to learn more about choosing email recipients.
-
Subject Line: Enter the subject line that recipients will see in their inbox.
-
Email Body: Build and format your message using the available components. Fuse email components include:
-
-
Text: A simple text box for adding to your email content.
-
Divider: Insert a line to separate sections.
-
Image: Insert an image from your Fuse image library or upload from your computer.
-
Button: Add a clickable button with custom text and a link (ideal for external pages, forms, or resources).
-
Spacer: Add adjustable vertical spacing between sections.
-
Video: Link a video (currently supports Wistia and YouTube). A play button is added to the top of the thumbnail, linking directly to the video.
-
Policies: Insert a list of the active insurance policies for the client; refer to the Policies component article for more details.
-
Signature: Add a signature block with customizable fields such as photo, phone number, and text fields.
- Attach: Add file attachments to your email. Attachments appear at the bottom of the email as an attachment "drawer" and cannot be placed in the middle of the email body. You can drag and drop files in bulk or click to select files from your device.
-
Limits: Maximum of 10 files per email.
-
Size: Maximum total attachment size of 10 MB (combined across all files).
-
Supported File Types:
-
-
Documents: PDF, DOC, DOCX, RTF
-
Spreadsheets: XLS, XLSX, CSV
-
Text: TXT, CSV
-
Images: JPG, JPEG, PNG, GIF, BMP, TIFF
- Archives: ZIP
- Media: MP4, MP3, WAV
-
-
-
-
Choosing Your Audience
After composing your email, choose who should receive the broadcast.
-
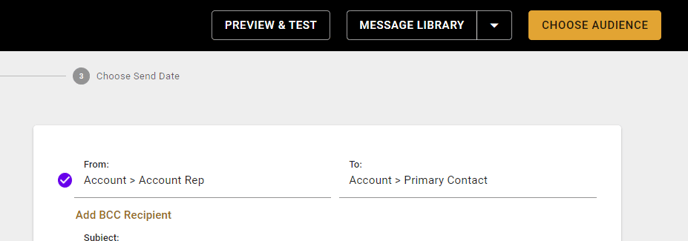
Click Choose Audience in the upper‑right corner of the screen.
-
Depending on how you started: If you came from the Accounts view and preselected a segment, this step may already be completed.
-
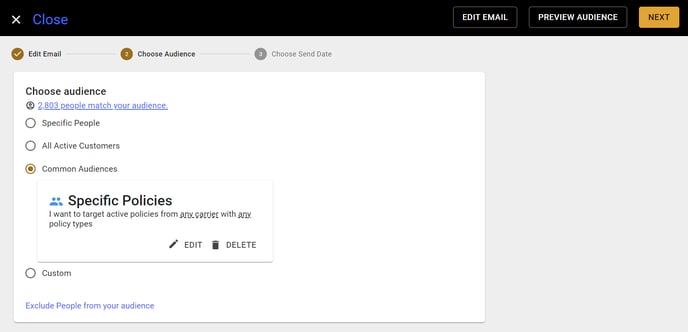
Audience options include:
-
Specific People: Manually select specific people to receive the email.
-
All Active Customers: Target every active account in your list.
-
Common Audiences: Use pre‑built audience groups.
-
Custom: Build a custom segment using filters.
-
Recipient configuration (primary vs secondary contacts) is still controlled in the email builder, separate from this audience selection.
Choosing Send Date
Now that your email is composed and the audience is selected, finalize when and how your broadcast will be sent.
- Message title: Enter a message title for internal use only; this is not the subject line your clients see.
-
Send options:
-
Save for Later: Save as a draft you can return to later. The email will appear under Drafts in the Broadcasts menu.
-
Save and Close: Save in Drafts and close the editor. The email will appear under Drafts in the Broadcasts menu.
-
Schedule Later: Choose a future date/time to send; the email will appear under Scheduled in the Broadcasts menu.
-
Send It Now: Immediately send the email to the selected audience.
-
FAQ
If I have customers in my system multiple times with the same email, will they get multiple messages?
No. When sending an email blast, we will analyze the list of targeted email addresses and only send one message per email address. In other words, we eliminate duplicates to save you any embarrassment.