
While we always recommend working with our Quick Start Pipelines to accomplish your pipeline management goals, we understand that your agency may have a specific use case in mind for maximizing your use of the Pipeline tool.
Creating custom pipelines in Fuse is a great way to tailor the Pipeline tool to your agency's specific sales process. When creating a custom pipeline, you're able to customize the stages to fit your needs. If you're looking to create a new pipeline more quickly and following our best practices, you can check out this article about Quick Start Pipelines, which are all created by our professional content team.
How Do I Create a Custom Pipeline?
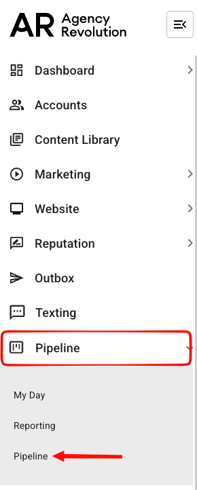
To get started, you'll need to navigate to the Pipeline page within the Agency Revolution workspace. Open the left the sidebar and find the "Pipeline" option, then select "Pipeline" from the dropdown menu. This will take you to the main Pipeline board view.
Now that you're on the Pipeline page, find the gear icon on the right side of your screen and click it. Select "+ New Pipeline" to get started.

💡 Important Note: You must have Manager-level user permissions within Fuse to create a new pipeline. Agents cannot create pipelines. To learn more about Fuse user levels, click here.
You'll be able to look through our Quick Start Pipelines from this page as well. Scroll down to the bottom of the page and select "Create Custom Pipeline."

Creating Your Custom Pipeline
You'll start the process by being asked to name your pipeline. Give it a descriptive name and description so you can focus your sales efforts. Once you've filled out the information as desired, click "Create" in the bottom right corner.

Creating Custom Pipeline Stages
Up next, you'll be creating stages for your new pipeline. There are two stages built into every single pipeline: "Prospects" and "Closed." This is because every lead starts as a prospect, and eventually reaches a decisions, either won or lost. You can click on these stages to change their name and description to better fit your agency's unique workflow.

To add a new stage into your custom pipeline, click the "+ Add Stage" button at the top of the screen. The newly created stage will be added under the first locked "Prospects" stage. If you renamed that locked stage, the newly created one will still appear under it. Give your new stage a name and description to keep things organized.
Add as many stages as you like to capture your agency's sales process. You can click the dots to the left of a created stage to drag and drop their order between the two locked stages. Clicking on the trash can icon to the right of a created stage lets you delete it.
Click "Next" in the bottom right corner when your stages are created and put in the proper order.
What happens if I remove an active stage in my pipeline?
If you try to remove an active stage from a pipeline, meaning a stage that has leads in it already, you'll be asked to transfer all active leads to another stage so nothing gets lost.
💡 Important Note: Account data is updated when moving leads to a new stage. Communication from the removed stage will cease unless it is already in the Outbox.
Creating Steps For Your Custom Pipeline
When you move a lead from stage to stage in your custom pipeline, you may want there to be some automated communications that send out of Fuse once they enter a new stage. This is referred to as our Pipeline Journeys feature. You can learn more about Pipeline Journeys in this Help Center article.

For each stage in your custom pipeline, you're able to click the "Manage Steps" button on the right side of the stage and create a sequence of steps similar to the way you'd build an email campaign in Fuse. Clicking "Manage Steps" opens up a window for you to start customizing the automated communications Fuse will send leads who enter that stage.

From this screen, you can toggle the Outbox on or off, just like when building an email campaign. You can click the "Add a Step" button, or click the "Click Here to Add Step" box to add steps. For each step you've added, you'll be able to edit them by clicking the pencil icon to the right of the step itself.
When you add an email step and click to edit it, you'll be taken to the email editor. Make sure to click "Save & Close" from the email editing screen to be brought right back to the steps editor. Once you're happy with the steps for a given stage, you can click "Launch" in the bottom left corner of the steps screen to get the steps live. Remember: nothing will end until a lead card enter that stage.
Alternatively, you can leave things in draft mode and continue working on steps in other stages. To do this, just click the "X" in the top left corner of the steps editing screen. That will collapse the editor and let you go back to your main steps screen.
Once your custom pipeline looks good, click "Finish" at the bottom right corner of your screen. Tada! Your new custom pipeline has been created. You're now able to add leads to that pipeline and move them through your created stages to hopefully get the deals closed won!