
In this article we'll cover:
Billing Setup
First, you will need to make sure your postcard billing is set up. Navigate to the gear icon located in the top right corner of your dashboard and click "All Settings":
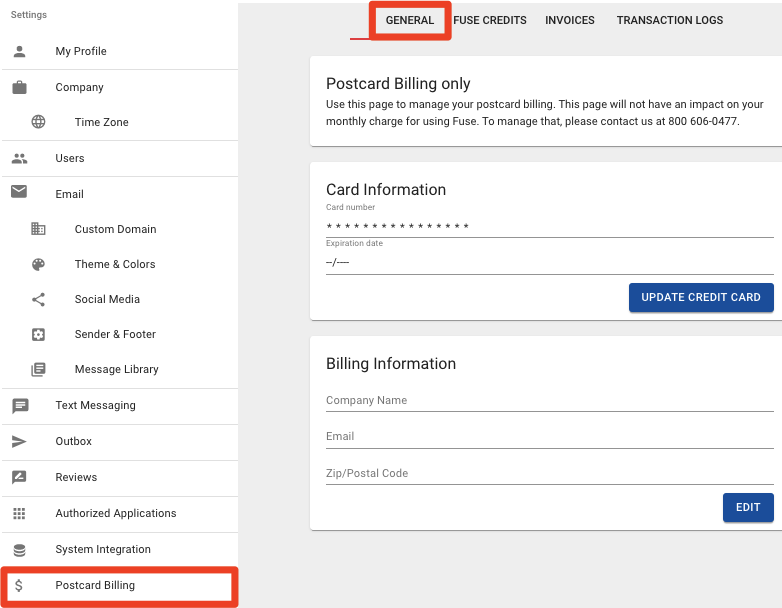
In the settings menu located on the left side of your screen, click "Postcard Billing." Under the "General Tab," you will be able to update your postcard billing information:
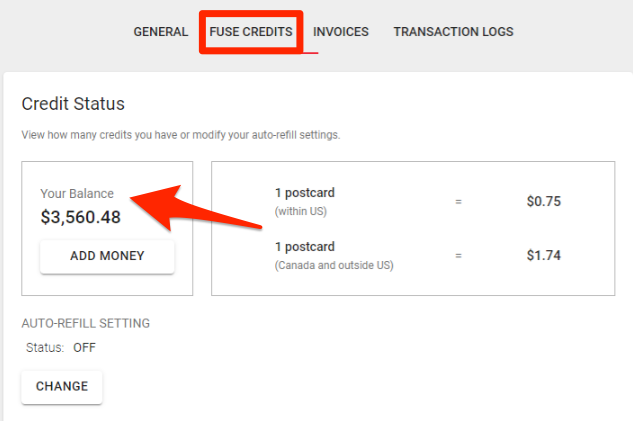
You can view your Fuse Credit balance under the "Fuse Credits" tab:
Automatic Billing
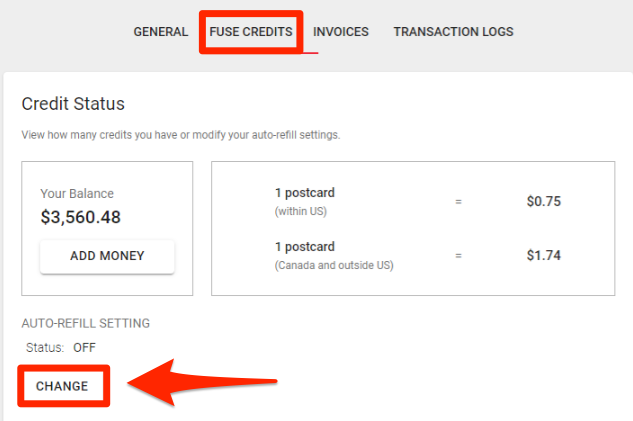
Looking to set up automatic billing? Under the "Auto-Refill Setting" of the "Fuse Credits" tab, click the Change button:
In the Auto-refill Settings modal that opens, toggle on "Auto-refill" and click Save.
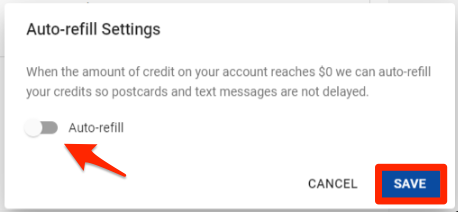
Voila! You are now set up for postcard automatic billing!
Creating and Sending Postcards
Note: Before you continue, make sure to create the segment that you intend to use for the postcards. Not sure how to create a segment? Click here for instructions!
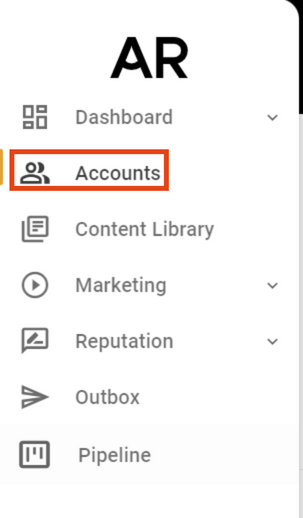
To create a postcard, first, navigate to Accounts:
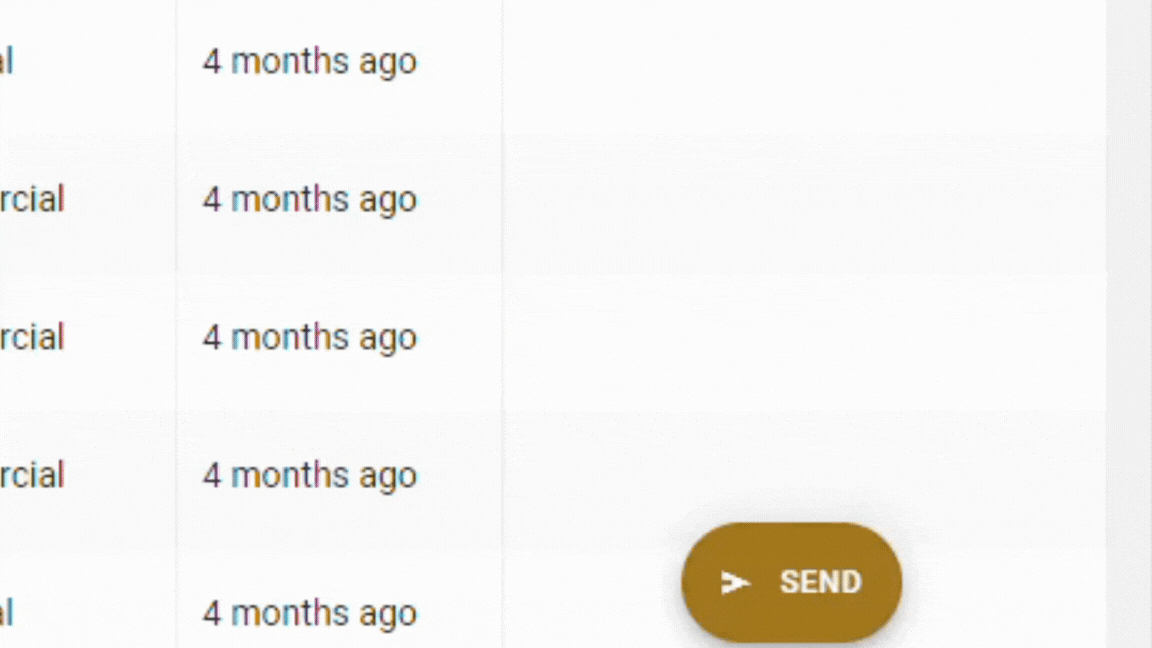
On the bottom-right corner click on Send >> More >> Send One Postcard:
Step 1: Name Your Message
Name your postcard message and click "Continue":
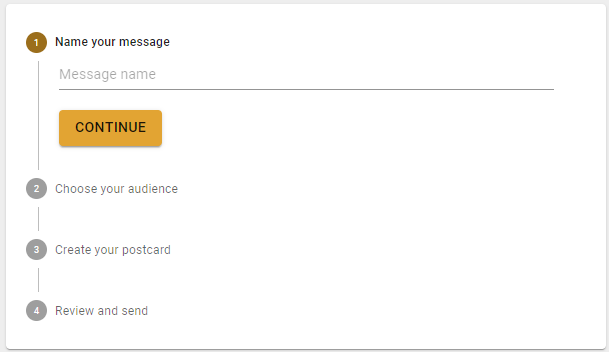
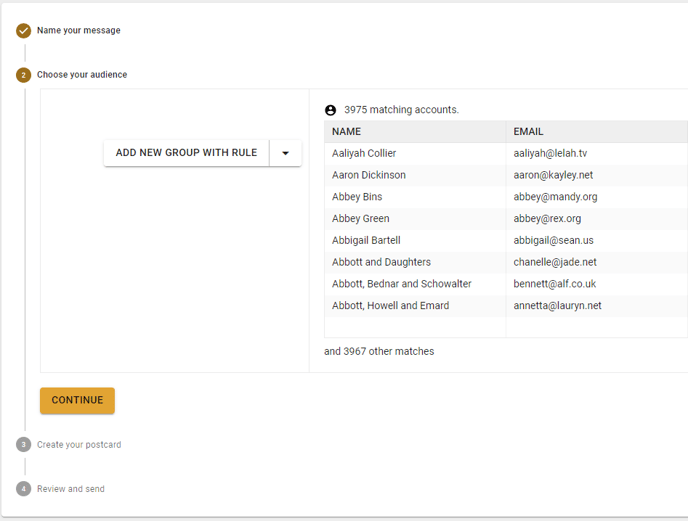
Step 2: Choose Your Audience
Select "Add New Group With Rule," and select a rule or add a new rule:

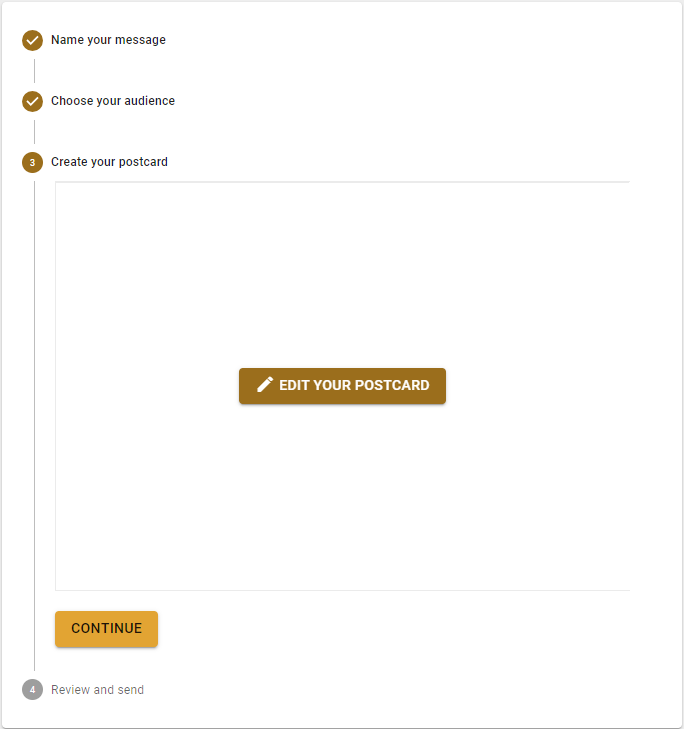
Step 3: Create Your Postcard
Click "Edit Your Postcard" to create a new postcard:
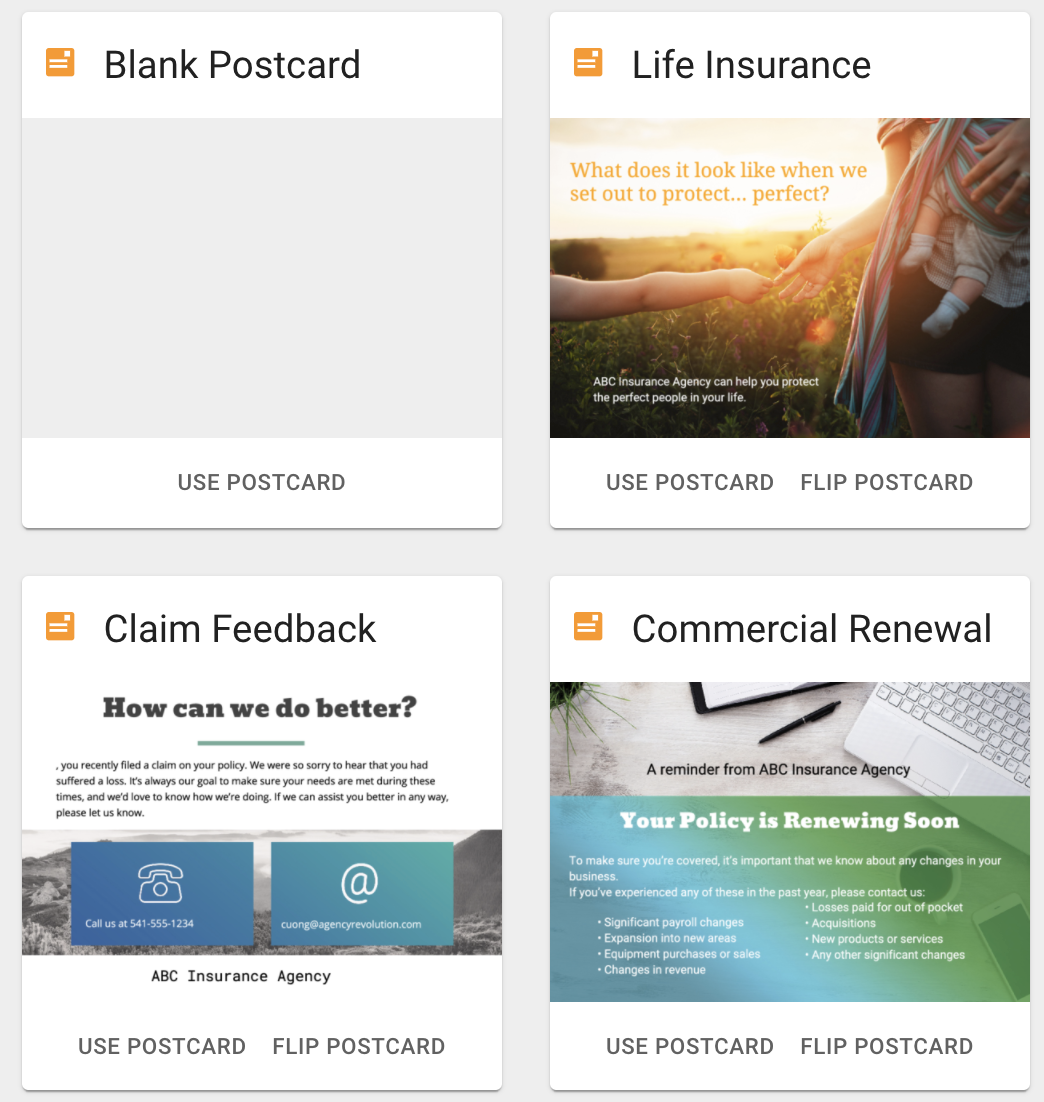
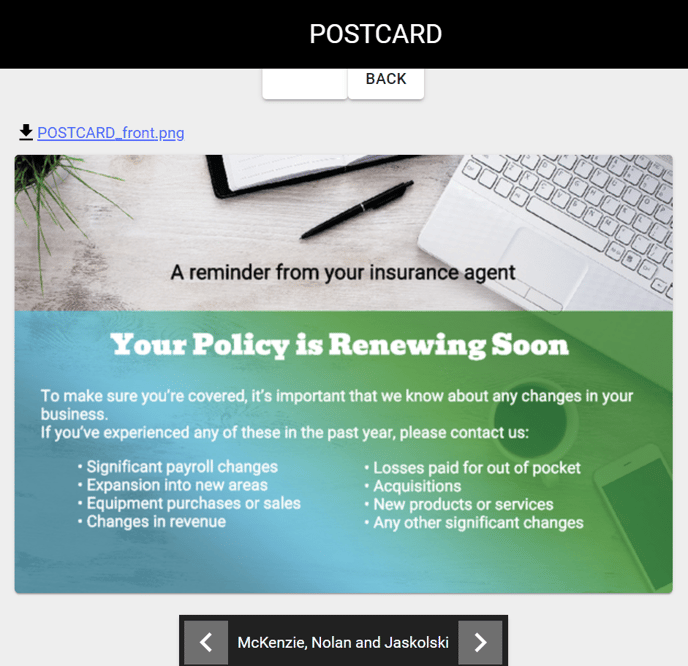
Here, you can choose a template or choose a blank postcard to start from scratch:
After you select your postcard, the Postcard Editor will appear. If you click the pencil in the bottom right corner, you will see the following options:

-
Image Component: this tool allows you to grab images from your existing library, select images from our public library, or upload new images. To keep images looking sharp when they are printed we require high-resolution images. If you are unable to size your image any larger, it is because the image is not high enough quality. Upload a higher resolution image. This is to protect you from sending grainy or poor quality graphics.
-
Overlay Component: this is a flexible tool that lets you change the color of your postcard or use a background element to make the text visible in front of an image. You can manipulate the color, opacity, and round the corners.
-
Text Component: this tool lets you add and edit text. You have a few options here:
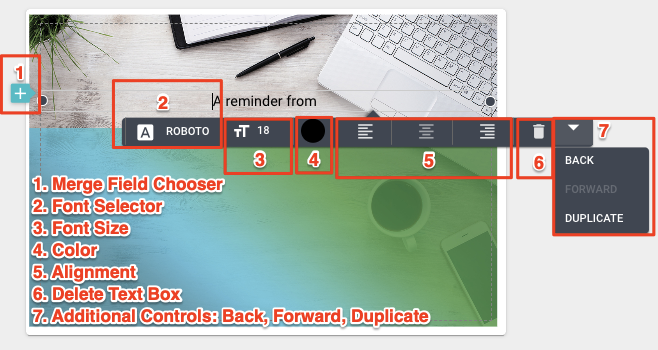
Additional Notes on the Merge Field Selector:
Be careful when using merge fields. It may cause your layout to change. Also, test all merge fields to make sure the data is formatted in a way you like.
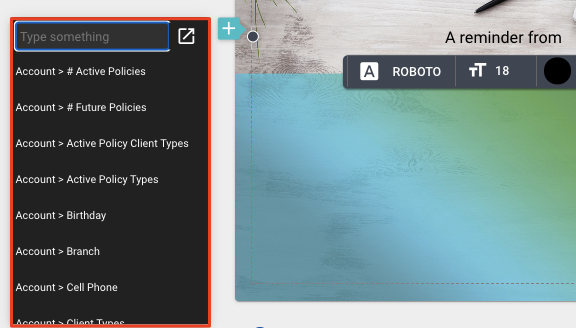
After choosing a merge field the token is rendered inside the postcard:

Previewing Postcards
Select the "Preview" on the top right:

To preview the postcard with different customer names, toggle the customer names at the bottom:
Sending a Test Postcard
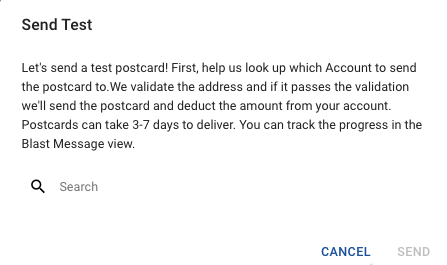
Want to send a test postcard? Click "Send Test" on the top right:
.png?width=688&height=432&name=Untitled%20design%20(49).png)
Here, you can search for the customer you would like to send a test postcard to, and click "Send":
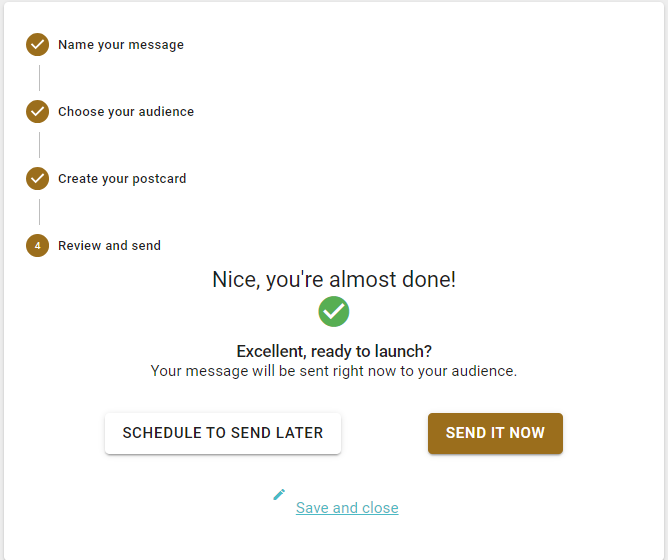
Step 4: Review and Send
If you are ready to send your postcard, click "Done" on the top right. You can now schedule the postcard to send! You can either "Schedule Later" or "Send It Now":
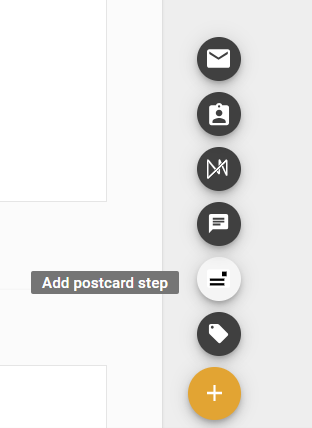
Sending a Postcard in a Sequence
Looking to add a postcard as a sequence step? When you are editing the sequence, on the bottom-right corner click on the plus icon>>Add Postcard Step:
Before you continue, make sure to create the segment that you intend to use for the postcards.