
Pipeline Journeys offer a way to build out automated communications through various stages of your unique pipelines. Each Pipeline Journey is made up of a series of steps that help automate sales touches throughout your prospecting process.
Pipeline Journeys are an additional personal touch you can customize while building a pipeline within Fuse's Pipeline tool. To learn more about the Fuse Pipeline tool, check out this Help Center article.
How do I set up a Pipeline Journey?
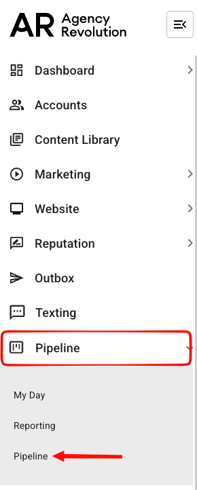
To get started, you'll need to navigate to the Pipeline page within the Agency Revolution workspace. Open the left the sidebar and find the "Pipeline" option, then select "Pipeline" from the dropdown menu. This will take you to the main Pipeline board view.
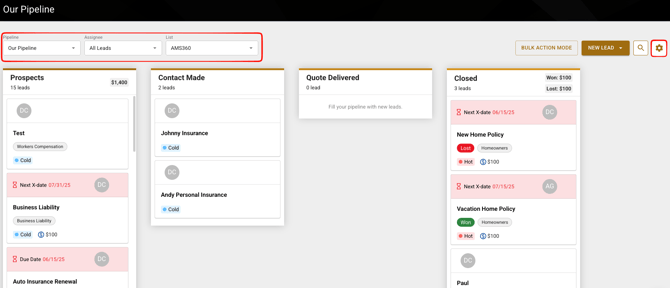
Now that you're on the Pipeline page, find the specific pipeline you'd like to work on by selecting it from the dropdown on the left side of your screen. Once you're on the correct pipeline, click on the gear icon to the right side of your screen, and select "Manage Pipeline."
💡 Important Note: You must have Manager-level user permissions within Fuse to manage a pipeline. Agents cannot manage pipelines. To learn more about Fuse user levels, click here.
Once you click "Manage Pipeline," you'll see a few different tabs where you can edit your pipeline details, as well as the stages in your pipeline. The Pipeline Journey edits take place on the third tab, called "Manage Steps." Click on that tab, and you'll be able to create a unique communication journey for each stage in your selected pipeline.
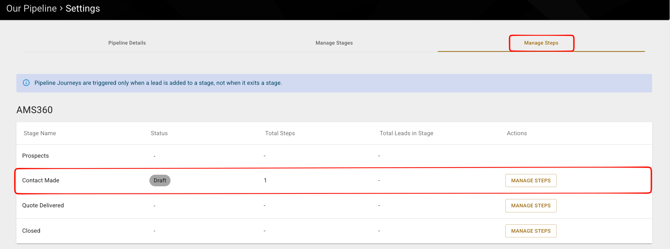
In the example above, you'll see there's a drafted step on the "Contact Made" stage. If an agency manager wanted to add more steps, edit steps, or go live, they would click "Manage Steps." When you click the "Manage Steps" button, you'll be editing the steps for the specific stage next to the button. For example, if you clicked "Manage Steps" on the "Quote Delivered" stage, you'd be editing the Pipeline Journey steps for that stage, and that stage only.
What does managing steps look like?
When managing steps in a Pipeline Journey, it's encouraged to follow the best practices you'd use when sending out emails from Fuse. Add communication steps at important touch points and focus on making sure each email is well-timed, and adds value to your prospect. Remember: you want to be working leads who expect to hear from you at key parts of the buying journey.
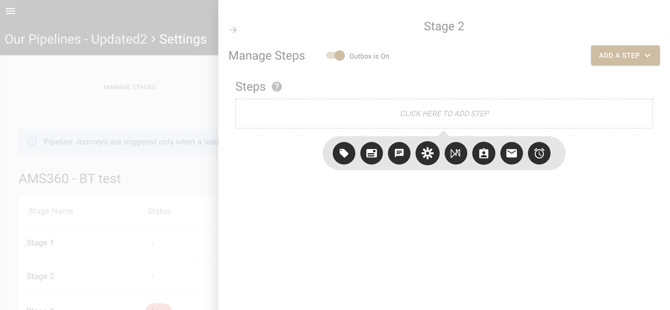
In the "Manage Steps", you can:
- Turn the Outbox On or Off: Just like with regular Fuse campaigns, having the Outbox toggled on for your Pipeline Journey will hold the specific communications for seven days in the Outbox, giving you time to approve them before they send automatically.
- Step Options: Similar to building Fuse campaigns, you have a range of step options to build your ideal Pipeline Journey:
- Emails
- Text Steps
- Postcards
- Internal Fuse Tags
- Wait Steps
- Add or Delete Steps: Modify the steps within a stage to tailor the communication process.
- Launch: Set your steps live, meaning that whenever a lead is dragged and dropped into this specific stage, they will go through the Pipeline Journey you just built.
What are the different statuses on the "Manage Steps" page?
When your steps are live and you decide to edit again, you will get a status indication that there are "Changes Pending."
- Draft: The Draft status appears when nothing has been launched within a stage.
- Pause: After changes have been made, click "Pause" to pause the stage status.
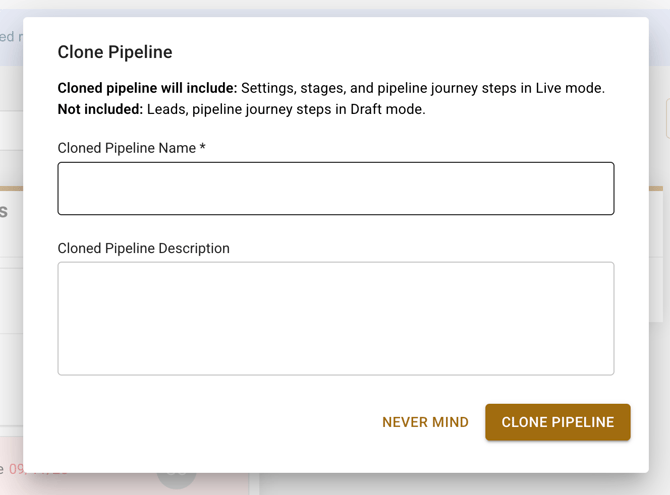
Cloning a Pipeline Journey
Please be aware that when cloning your Pipeline Journey, only live Journey steps will clone to your new Pipeline Journey. Not to worry! We have a handy tooltip that will pop up to remind you that any steps in Draft mode will not be cloned. As well, no leads can be cloned between Pipeline Journeys.
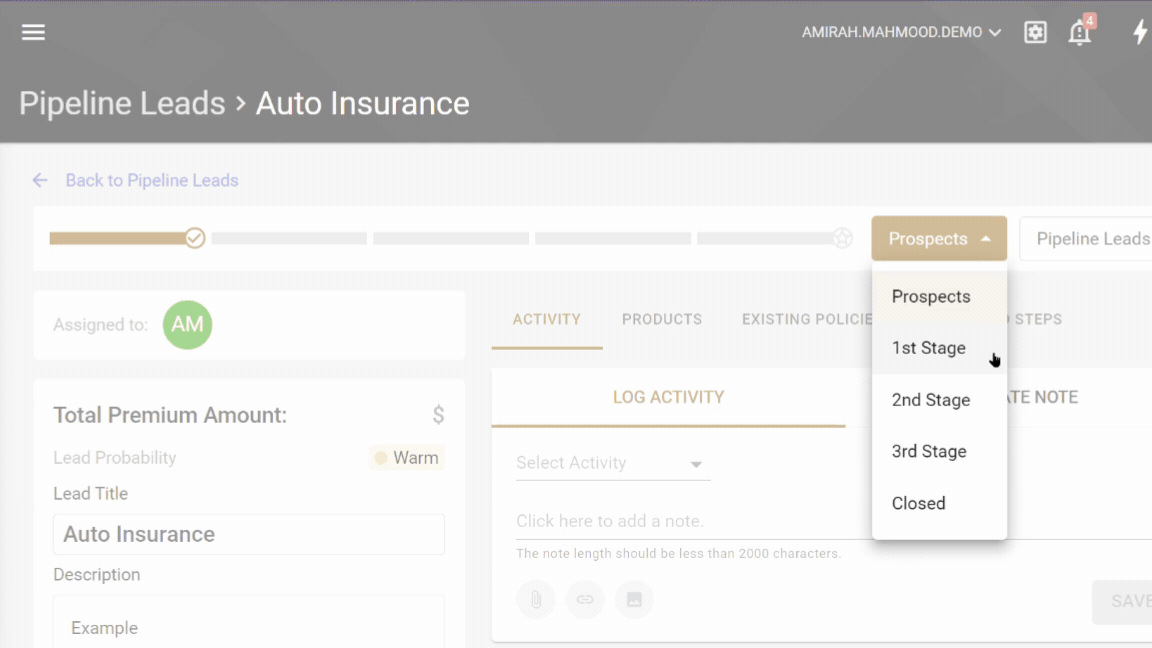
What happens when I move a lead from one stage to another with a Pipeline Journey?
When transitioning a lead to a new stage, a window will pop up to provide a preview of the upcoming steps in their new stage.
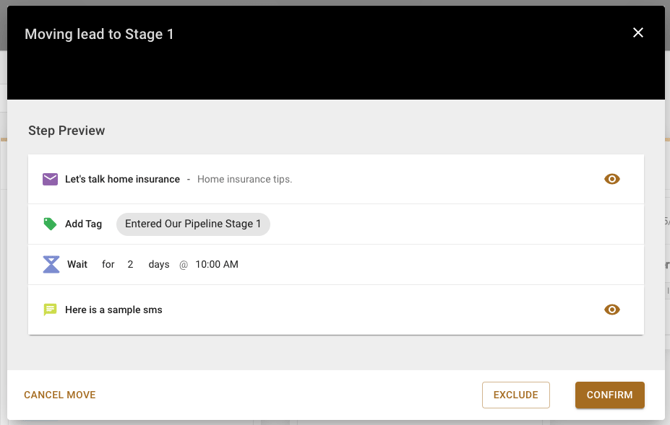
- The window displays all the steps a lead will experience.
- You can preview individual steps within the modal window.
- To proceed, select one of the following actions:
- Cancel Move: Retain the lead in the current stage.
- Exclude: Omit sending any steps.
- Confirm: Initiate the movement and send all steps.
What happens if I remove a lead from a Pipeline Journey?
When a lead is removed, their data is stored on the user’s account page as proof of deletion from the pipeline. All future communication within that pipeline stops once the lead is removed.