
Creating an email in Fuse from start to finish
Fuse lets you create emails from scratch for both Campaigns and Broadcasts, in addition to using the Content Library. This article guides you through the entire process, from accessing the email builder to selecting the sender and recipient, creating content with components and merge fields, adding attachments, and previewing/testing your message.
Creating an Email
You can open the Fuse email builder in two main ways.
- From a Broadcast:
- Go to Marketing > Broadcasts in Fuse.

- Click the Send icon and choose Send Email from the dropdown.
-png.png?width=236&height=193&name=image%20(4)-png.png)
- When prompted, select Start From Scratch to open a new email in the builder.
- Go to Marketing > Broadcasts in Fuse.
- From a Custom Campaign:
-
From the sidebar, open Custom Campaigns.
-
Add an email step to your campaign sequence.
-
For the email step, select Start From Scratch to open the builder.
-
Selecting Sender and Recipient
Choosing the right sender and recipient settings helps your message feel relevant and personal.
-
Email Sender:
-
Options include Account Rep, Producer, or a Specific Employee who has been configured in Fuse.
Note: If you don't see the correct user to send from, please review this article to help you add a new user to Fuse: Add A New User in Fuse.
- You may also send an email based on the policy‑level rep, if configured; see the related help article on setting up policy‑level reps for details.
-
-
Email Recipient:
-
This setting controls who within each account receives the email; it does not select your audience segment.
-
Options:
-
Account > Primary: Sends only to the primary email on the account.
-
Account > Primary and Secondary Contacts: Sends to both primary and secondary contacts.
-
Account > Only Secondary Contacts: Sends only to secondary contacts.
-
-
Your actual audience segment (which accounts are targeted) is selected elsewhere in the campaign or broadcast flow.
Using Components in the Email Builder
Once sender and recipient are configured, you can build your content using components on the left side of the builder.

- Clicking a component adds it to the bottom of your email; you can also drag and drop components into position.
- Fuse Email Components:
-
Text: A simple text box for adding to your email content.
-
Divider: Insert a line to separate sections.
-
Image: Insert an image from your Fuse image library or upload from your computer.
-
Button: Add a clickable button with custom text and a link (ideal for external pages, forms, or resources).
-
Spacer: Add adjustable vertical spacing between sections.
-
Video: Link a video (currently supports Wistia and YouTube). A play button is added to the top of the thumbnail, linking directly to the video.
-
Policies: Insert a list of the active insurance policies for the client; refer to the Policies component article for more details.
-
Signature: Add a signature block with customizable fields such as photo, phone number, and text fields.
- Attach: Add file attachments to your email. Attachments appear at the bottom of the email as an attachment "drawer" and cannot be placed in the middle of the email body. You can drag and drop files in bulk or click to select files from your device.
-
Limits: Maximum of 10 files per email.
-
Size: Maximum total attachment size of 10 MB (combined across all files).
-
Supported File Types:
-
Documents: PDF, DOC, DOCX, RTF
-
Spreadsheets: XLS, XLSX, CSV
-
Text: TXT, CSV
-
Images: JPG, JPEG, PNG, GIF, BMP, TIFF
- Archives: ZIP
- Media: MP4, MP3, WAV
-
-
-
Using Merge Fields
Merge fields automatically pull client and policy data from your AMS into your email, so each recipient sees information personalized for them.
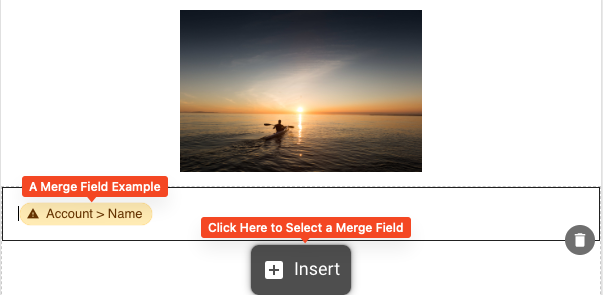
- To insert a merge field in your email body:
- Click the Insert icon in the editor toolbar.
-
Choose from available fields such as names, policies, titles, and more, depending on your AMS integration.
-
You can also use merge fields in subject lines and buttons; see the related help article to learn more.
Using FirstDraft for Writing Help
Fuse includes FirstDraft, an AI‑powered tool to help you draft and refine email content.
-
FirstDraft is designed for independent insurance agencies and can be customized to match your agency’s tone and style.
-
For details on how to use FirstDraft to create or improve email copy, see the dedicated FirstDraft help article.
Previewing and Sending Test Emails
When you’re happy with your email in Fuse, it’s time to preview and test the email.
-
Preview:
-
Click Preview and Test at the top of the email builder.

-
The preview screen shows desktop and mobile views of your email.
-
Note: The account used in preview is random and does not represent the actual audience segment for your send.
-
-
Send a test email:
-
In the preview screen, click Send Test in the top‑right corner.

-
Enter the email address where you want to receive the test, then click Send in the pop‑up.
-
Use test sends to verify that all elements in your email display correctly before sending to your audience.